
How to Create Custom Meta Box in WordPress: 2026 Developer’s Guide
As a WordPress developer, moving beyond basic themes and plugins often means needing to store more than just the main content.
Whether you’re building a real estate site that needs a “Price” field, a reviews site that requires a “Star Rating,” or a custom solution for a client, you need a way to add and manage custom data for posts, pages, or custom post types.
The native WordPress solution for this is a custom meta box.
Learning how to create a custom meta box in WordPress is a fundamental skill that gives you precise control over your site’s data architecture.
While plugins like Advanced Custom Fields (ACF) offer a user-friendly way to achieve this, building a meta box from scratch gives you a deeper understanding of the WordPress core, results in a more lightweight solution, and provides complete control over the functionality.
With WordPress powering over 43% of the web in 2026, knowing how to manipulate its core data structures is an essential professional skill.
This guide will provide a clear, step-by-step walkthrough of how to create, display, and securely save data from a custom meta box.
We’ll cover the essential functions, security best practices like nonces and data sanitization, and provide clean, modern code you can adapt for your projects.
Key Takeaways
- The Core Functions: Understand the three key WordPress functions at the heart of every custom meta box: add_meta_box(), get_post_meta(), and update_post_meta().
- The “Why” Behind Meta Boxes: Learn why meta boxes are the native WordPress way to add structured, custom data to any post type, from “Event Date” to “Product SKU.”
- Security is Non-Negotiable: Discover how to properly secure your meta box with a nonce field to prevent CSRF attacks and why you must always sanitize data on input and escape it on output.
- A 3-Step Process: Get a simple, repeatable 3-step process for building any custom meta box: 1) Registering the box, 2) Displaying the HTML fields, and 3) Saving the data securely.
- Code You Can Use: Receive clear, well-commented code examples that you can use as a starting point for your own custom meta box projects.
What is a Custom Meta Box?
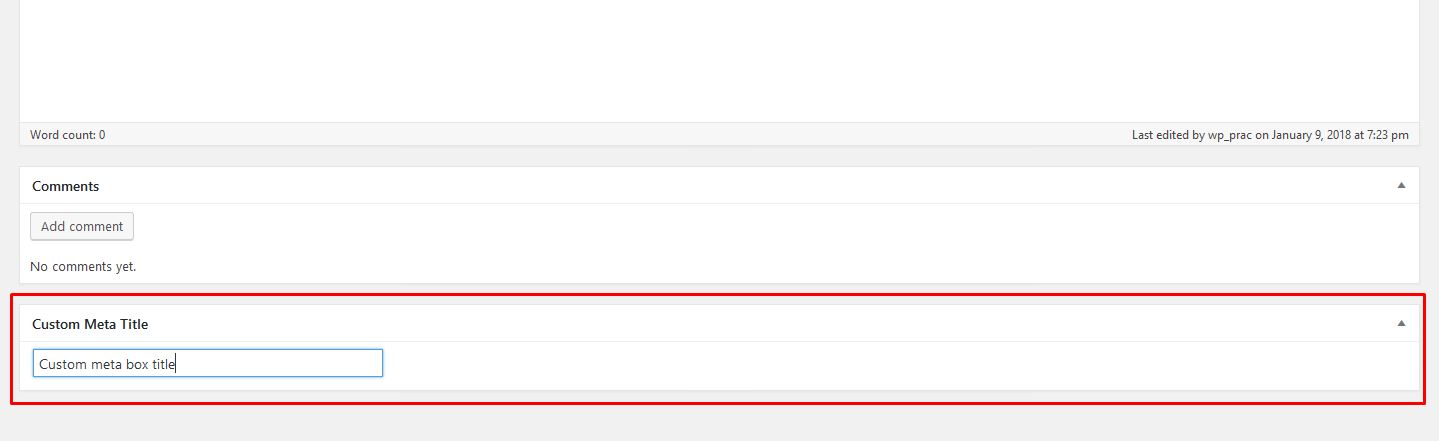
A meta box is a draggable box that appears in the WordPress editor screen for posts, pages, or custom post types. Its purpose is to allow users to enter additional information or “metadata” associated with that piece of content.
This metadata is then saved to the wp_postmeta table in the database and can be retrieved and displayed anywhere on your theme.
The 3 Steps to Creating a Custom Meta Box
The entire process can be broken down into three logical steps. All of this code should typically be placed in your theme’s functions.php file or, for better organization, in a site-specific plugin.
Step 1: Register the Meta Box
First, you need to tell WordPress to create the meta box. We do this using the add_meta_box() function, which we’ll hook into the add_meta_boxes action.
The add_meta_box() function takes several parameters:
- $id: A unique ID for your meta box.
- $title: The title displayed at the top of the meta box.
- $callback: The name of the function that will output the HTML for your meta box fields.
- $screen: The screen(s) where the meta box should appear (e.g., ‘post’, ‘page’, or your custom post type name).
- $context: Where on the screen the box should be displayed (‘normal’, ‘side’, or ‘advanced’).
- $priority: The priority within the context (‘high’, ‘low’, or ‘default’).
/**
 * Register the custom meta box.
 */
function myplugin_add_custom_meta_box() {
    add_meta_box(
        'myplugin_meta_box_id',                 // Unique ID
        'Additional Page Information',          // Box title
        'myplugin_meta_box_html_callback',      // Callback function
        'page',                                 // Post type
        'side',                                 // Context
        'default'                               // Priority
    );
}
add_action( 'add_meta_boxes', 'myplugin_add_custom_meta_box' );
In this example, we’ve registered a meta box with the title “Additional Page Information” that will appear on the sidebar of the ‘Page’ editor screen.
Step 2: Display the HTML for the Meta Box Fields
Next, we need to create the callback function we named in Step 1 (myplugin_meta_box_html_callback).
This function is responsible for outputting the HTML form fields (like text inputs, dropdowns, etc.) inside the meta box.
A crucial part of this step is security. We must include a nonce field.
A nonce (number used once) is a hidden token that WordPress uses to verify that the request to save the data is legitimate and coming from the correct screen, protecting against Cross-Site Request Forgery (CSRF) attacks.
The Code:
/**
 * Callback function to display the HTML for the meta box.
 *
 * @param WP_Post $post The post object.
 */
function myplugin_meta_box_html_callback( $post ) {
    // Get the existing value of the custom field, if it exists.
    $subtitle = get_post_meta( $post->ID, '_myplugin_subtitle', true );

    // Add a nonce field for security.
    wp_nonce_field( 'myplugin_save_meta_box_data', 'myplugin_meta_box_nonce' );

    // Display the form field.
    ?>
    <p>
        <label for="myplugin_subtitle_field">Page Subtitle:</label>
        <input type="text" id="myplugin_subtitle_field" name="myplugin_subtitle_field" value="<?php echo esc_attr( $subtitle ); ?>" class="widefat">
    </p>
    <?php
}
Code Breakdown:
- get_post_meta(): We use this to retrieve any previously saved value for our custom field (_myplugin_subtitle) so it can be displayed in the input field. The underscore _ at the beginning of the meta key tells WordPress to hide it from the default “Custom Fields” meta box, which is good practice.
- wp_nonce_field(): This is the critical security function. It generates a hidden nonce field to be submitted with our form.
- The HTML: We create a simple label and text input. Notice that we use esc_attr() when outputting the saved value. This escapes the data for safe display within an HTML attribute, preventing XSS vulnerabilities.
Step 3: Save the Meta Box Data
Finally, we need to save the data that the user enters into our custom field. We do this by hooking a function into the save_post action, which fires whenever a post is created or updated.
This function will perform three essential tasks:
- Verify the nonce to ensure the request is valid.
- Check user permissions to make sure the current user is allowed to edit the post.
- Sanitize the user input and save it to the database using update_post_meta().
The Code:
/**
 * Save the custom meta box data.
 *
 * @param int $post_id The ID of the post being saved.
 */
function myplugin_save_meta_box_data( $post_id ) {
    // 1. Verify the nonce.
    if ( ! isset( $_POST['myplugin_meta_box_nonce'] ) || ! wp_verify_nonce( $_POST['myplugin_meta_box_nonce'], 'myplugin_save_meta_box_data' ) ) {
        return;
    }

    // 2. Ignore autosaves.
    if ( defined( 'DOING_AUTOSAVE' ) && DOING_AUTOSAVE ) {
        return;
    }

    // 3. Check the user's permissions.
    if ( ! current_user_can( 'edit_post', $post_id ) ) {
        return;
    }

    // 4. Sanitize and save the data.
    if ( isset( $_POST['myplugin_subtitle_field'] ) ) {
        $subtitle_data = sanitize_text_field( $_POST['myplugin_subtitle_field'] );
        update_post_meta( $post_id, '_myplugin_subtitle', $subtitle_data );
    }
}
add_action( 'save_post', 'myplugin_save_meta_box_data' );
Code Breakdown:
- Nonce Verification: We check if our nonce was submitted and if it’s valid using wp_verify_nonce(). If not, we stop execution immediately.
- Autosave Check: We prevent the function from running during autosaves, which can be disruptive.
- Permission Check: We use current_user_can() to ensure the user has the authority to edit the post.
- Sanitize and Save:
- We check if our field was submitted using isset().
- We use sanitize_text_field() to clean the user input, stripping any potentially malicious HTML or scripts. This is the most important sanitization step.
We use update_post_meta() to save the clean data to the database, associating it with the current $post_id.
Watch the video about how to create a custom meta box in WordPress
Frequently Asked Questions (FAQ)
Where do I put this code?
For a specific theme, you can place this code in your functions.php file. However, the best practice for portability and maintainability is to create a site-specific plugin for your custom code.
How do I create other types of fields, like a dropdown or checkbox?
You would simply change the HTML in your callback function (Step 2). For a checkbox, you would use <input type=”checkbox”>. For a dropdown, you would use a <select> element with <option> tags. Your saving function (Step 3) would also need to be adjusted to handle the different data types accordingly.
Does this work with the Block Editor (Gutenberg)?
Yes. By default, custom meta boxes created with this PHP method will appear in the sidebar of the Block Editor. For a more native Block Editor experience, you would need to create custom blocks using JavaScript and the WordPress REST API, which is a more advanced topic.
Is it better to use a plugin like ACF instead of coding this myself?
ACF (Advanced Custom Fields) is fantastic for rapid development, complex field types, and for users who are not comfortable with code. It provides a user-friendly interface to build meta boxes.
Coding it yourself is better when you need a lightweight, high-performance solution, want complete control over the markup and functionality, and are building a theme or plugin for public distribution.
Conclusion: Gaining Full Control Over Your Content
Learning how to create a custom meta box in WordPress is a rite of passage for any developer looking to build truly custom and powerful websites.
By mastering the add_meta_box, get_post_meta, and update_post_meta functions, and by rigorously applying security best practices like nonces and data sanitization, you unlock the ability to structure content exactly as you need it.
While plugins offer a simpler path, understanding this core functionality gives you the power to build faster, more secure, and infinitely more flexible WordPress solutions.